Notice: Recent inclement weather conditions may cause delays in order processing and shipping times.

Toggle open
Homepage
Learning Library Blog Create and share your own videos and podcasts
Expand breadcrumbs

Create and share your own videos and podcasts

By Tyler DeWitt
September 21, 2019
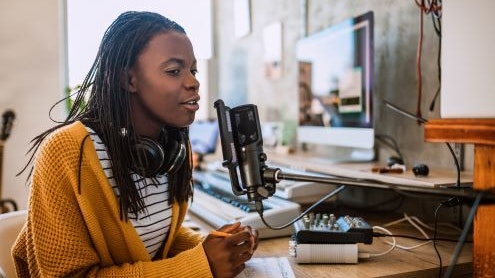
Createpodcasts Version Id Enci ON6 Y8 Ftg CP Qfpt DWUF Segjqq NO Ku

The explosion of teacher-created openly licensed educational resources, also known as open educational resources or OER, has transformed K-12 learning materials. No longer are educators tied to commercially produced curricula. Now they can use an idea developed by a teacher in another state or even across the globe.

Maybe you have a great lesson plan or even a course you'd like to share, but you don't know where to begin. Fortunately, it's easier than you think to create your own videos and podcasts and then share them with others. Just follow these steps:

Map it out 

The first step to creating a video or podcast series is to decide what you want to convey and how. How many videos will you create, what will each cover and how long will they be? Keep in mind that 3-5 minutes is ideal for a video but podcasts usually run 30 to 45 minutes.

Another thing to consider is how you'll want to connect the dots for your student viewers. If you want them to watch the videos in succession, you might end each video by saying, "In our next lesson ." If a video can stand alone, you might conclude by saying, "Now that you know about the structure of atoms, let's move on to ."  There's no right or wrong way. What's important is that you take the time to think through your approach.

Choose your props (yes, props!) 

When I realized that students learned biology more easily if they could picture the subject matter, I created three-dimensional representations of cells and molecules. The same approach would work for other subjects. For math, blocks or marbles can demonstrate equations. For history, art objects, paintings or primary documents could flesh out the topic.

Assemble your equipment 

Once you have your props in order, you're ready to record. There's a lot of fancy camera equipment out there, but I've found that it's easiest — not to mention cheapest — to take a DIY approach. Take some time to watch YouTube tutorials on how to set up your own studio with inexpensive items. 

Get your students involved

Your students are savants who know more about integrating technology into every aspect of life than most adults do. They're often thrilled to serve as video scribes. In fact, when I first started recording my lectures, the two tech-savvy students I recruited to be my sound crew took it upon themselves to edit the videos in a way that made sense to kids their age. 

Choose your software

Tools like Camtasia, Jing and Screencast-O-Matic, which range in price from free to $100, let you capture what's on your computer screen and use the mouse or your voice to direct the audience.

Once you have your video, there are a variety of ways to turn your DIY effort into a finished product. Screen-capturing software has built-in editing tools and often offers 30-day trials. If you choose free software, like Screencast-O-Matic, without the built-in tools, you can use more advanced editing software, such as iMovie, Final Cut and Adobe, which range in price from free to $299.

Organize your content

There are a lot of audio- and video-hosting sites that can help you manage your content. For audio, check out:

SoundCloud is used primarily for music sharing and consumption. Once you've created an account, you can upload content and playlists. One especially great feature is that it lets students insert comments and questions into the recording at whatever point they want. It's also available as an app for iPhones and Androids.

PodOmatic, like SoundCloud, allows you to upload content through a free account. Everything is clearly organized by subject, and there's an education section that can be helpful for lesson planning. Unlike SoundCloud, students cannot comment on the recordings. PodOmatic is available for iPhones and Androids.

Archive.org is another good option because it lets you create collections that your students can access. There's also a rich trove of material in case you want them to search for additional resources. It's not as user friendly as PodOmatic or SoundCloud, and it's only available for iPhones, not Androids.

For video, consider these options:

YouTube allows you to indicate whether you want to develop your material with or without a Creative Commons license. A Creative Commons license makes the content available to everyone for free, which is very much in the OER spirit of sharing and working for the greater good. All of my materials are under this license.

Vimeo makes it easy to upload videos because the site accepts many different types of file formats. It also has its own Vimeo Video School with lessons, tutorials and advice to help visitors learn how to make better videos.

TeacherTube lets you upload documents, photos, video and audio and organize your content into a "classroom." 

SchoolTube is significantly more streamlined than TeacherTube and is a great place to organize videos. One catch: Your school has to have a SchoolTube account.

Present your content

Once you have your lessons in place, you'll want to think about how to present them.

I'm a big fan of setting up stations with different learning tools at each and having students rotate among them in small groups. This gives you time to work more closely with the students and give each person more attention. It also lets students work through the lesson if they don't have their own personal tech tools (phones, tablets). This is especially important at schools that haven't moved to 1:1 learning, that have only a few tablets for the whole student body, or whose only computers are in a computer lab.

There are countless advantages to creating and sharing your own resources, not the least of which is addressing the Learner standard within the ISTE Standards for Educators, which instructs educators to continually improve their practice by learning from and with others and exploring proven and promising practices that leverage technology to improve student learning. Now that you have a few tips on how to get started, I hope you'll give it a try. I predict that once you do, you'll  never look back.

Got edtech questions? Our podcast has answers! Listen to Your Edtech Questions now.


Tyler DeWitt is the creator of the educational YouTube channel Science with Tyler DeWitt, and frequently presents on technology in education and how to boost students engagement in STEM subjects. Follow him on Twitter @tyleradewitt.

This is an updated version of a post that originally published on February 19, 2015.