Toggle open
Homepage
Learning Library Blog Flip your classroom with instructional screencasts
Expand breadcrumbs

Flip your classroom with instructional screencasts

By Tamara Letter
April 15, 2015
Img id 377 Version Id Bj6ufjo2 I Quhf Ynj N Xii MDWJ9 MV Xl Ar4

" "Sometimes I wish I could record myself teaching in September, then play it back to students in March so they can remember all the things they forgot," " said one veteran teacher I know with an exasperated sigh. She was looking for a way to provide small-group remediation while teaching new concepts to the entire class — a common challenge but no small task to achieve.

Teachers often struggle to successfully differentiate content to meet students' needs. One solution to this dilemma is to use instructional content videos, with or without a flipped learning model, to reteach and reinforce. The students who need more instruction on a given topic can access a short video and play it back as often as necessary until they get it.

Find or create videos to meet your needs

The easiest way to harness the collaborative power of instructional videos may be to find already existing videos on websites such as YouTube, TeacherTube, Vimeo, Learn Zillion and Khan Academy. Countless lessons, many taught by licensed teachers or even students, are free online and shareable with a posted link or embedded code.

However, it may not always be possible to find a perfect fit for your specific instructional needs. Perhaps the video is too long, or the content references a skill you haven't taught yet. Maybe the narrator's voice is difficult to understand or spoken in a dry monotone. You could spend hours watching videos created by others, only to resign your search in frustration, no more prepared for next week's small-group lesson than you were the week before.

Fortunately, it's easy to create your own instructional videos. Screencasting, or video screen narration, allows you to virtually teach your content while capturing your voice and movements across a computer screen. Unlike traditional videotaping, screencasting does not require you to show your face in the video and doesn't require any recording equipment beyond your computer.

How can you use screencasting in your classroom? If your class is reviewing key concepts about the Civil War, for example, you could use a screencast to reference historical photos on the Library of Congress website while correlating the key concepts students need to master for their final assessments. In math, you could use programs such as SMART Notebook to provide virtual paper and pen to work through complex algorithms, explaining each step of the process. Screencasting also provides a way for you to capture your lectures and trainings if you use Microsoft PowerPoint, Google Slides or Keynote.

Create screencasts with free online tools

Perhaps the most important decision you make in screencasting, besides the content itself, is the program you use to capture your recording. Explore the many free and paid options out there before you begin so you have the best fit for your instruction.

Free programs, such as Screencast-o-matic, are great if you need to capture a quick video and audio of 15 minutes or less. Use the online version or download for easier use with PCs and Macs, with no login required. You can upload finished videos to YouTube or download them for posting elsewhere. Screencast-o-matic also offers a paid version for $15 a year that lets you upload finished videos directly to Dropbox, Google Drive and other locations. The two drawbacks to using this free program include reduced audio clarity and the inability to edit finished videos.

Educreations is another free program that provides a virtual whiteboard for direct teaching or explanations, complete with colored ink choices and the ability to import images. The program is easy to use, and you can save finished videos to your own teacher's account as well as the Educreations community. The program is also available as an iOS app, which makes lesson creation videos easily accessible for teachers and students to share. The paid version ($11.99/month or $99.99/year) provides additional features, such as the ability to save videos to a device's camera roll, the ability to import documents and webpages, and 5 GB of cloud storage.

Invest in professional screencasting software

If your goal is to create a professional quality screencast, then Camtasia by TechSmith can meet your needs. This program is easy to use, with built-in editing options so you can record, edit and publish your screencasts all in one place.

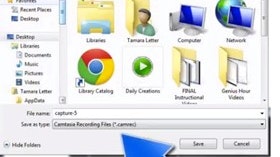
Recording is a snap. You just have to click a red button, then press F10 to stop. The program then brings you to an editing screen where you can splice out unwanted sections or import additional audio tracks, such as background music.

You can also overlay Camtasia's built-in tools, such as Zoom-n-Pan, which automatically resizes your screen as the focused area zooms in for a closer view. If you prefer a slightly larger or smaller zoom, this tool lets you manually adjust that as well. Other effects, including cursor highlighting and transitions, are also available.

Camtasia provides the most comprehensive formats for producing and publishing your videos. You can share to Google Drive, YouTube or Screencast.com or save your file as an MP4 (with or without a video player). Other file formats include .wmv, .mov, .avi, .m4v, and even .mp3 and .gif. The options are practically endless!

Camtasia is a paid program available for PC or Mac, but you can request a free 30-day trial to explore. If you decide to purchase the software, you can save $120 off the purchase price by identifying yourself as an educator.

Create your screencast in 5 easy steps

Once you have selected your program, you're ready to get started! Don't worry, it's really easy to create a professional-looking screencast. Just follow these five steps:

  1. Select your content. Decide what resources you will use to teach. Open and minimize websites and software programs first so you can easily click through tabs to grab what you need as you go.
  2. Plan out what to say. Having an outline nearby keeps you focused on exactly what you want to explain so you can be clear and concise.
  3. Use a microphone. An external microphone, such as one you would plug into your USB port, helps to produce a clear audio track for your recordings.
  4. Less is more. Several short videos on different aspects of a topic are more engaging and effective than one long 20-minute lecture. Ideally, each video should be 3-5 minutes in length.
  5. Share your screencast with students. Once your screencast is complete, you can decide where to share it for student access. If you store it on YouTube, you could create a Google Form assessment that directs students to a reteaching video if they answer a question incorrectly. If you store your screencast on EdPuzzle or Zaption, you can create assessment questions that will overlay your video and require students to answer before continuing playback. You can also share with students by uploading to Edmodo or placing in a folder on Google Drive.

Watch the video below to learn more about using Camtasia to create screencasts for your classroom.

Want to learn more tips and tricks for flipping your classroom? Check out our flipped learning bundle!

Tamara Letter has been an elementary teacher, differentiation specialist and technology integrator. She holds a master's degree in educational leadership and is licensed as a PK-12 administrator. She is also a SMART Certified Lesson Developer and Exemplary Educator, Graphite Certified Educator and Edmodo Support Ambassador. And she is a mom of three who enjoys blogging about Random Acts of Kindness and creating recipe guides for Snapguide. Connect with her on Twitter at @HCPSTinyTech.