Happy Holidays from ISTE+ASCD. Our offices will be closed Dec. 23-Jan. 1. Visit the FAQs

Toggle open
Homepage
Learning Library Blog The complete guide to using machinima in the classroom
Expand breadcrumbs

The complete guide to using machinima in the classroom

By Tatiana Martin
August 25, 2015
Img id 519 Version Idm Ym Q Ne1 YF Yv F2w1gs249 F Th NUX Po R Ifl

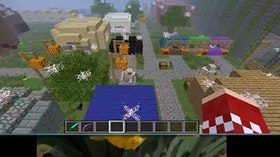
Ask any fifth grader to show you their favorite video, and you will likely see a Minecraft LP (which stands for “let’s play”) video. Chances are, when they aren’t playing games on their computers and phones, they are probably watching machinima, or DIY narrated videos that fans make in (and about) games or virtual worlds.

Wouldn’t it be great if you could harness that type of engagement for learning? Guess what? You can! Educators all over the world are using machinima — a portmanteau of machine and cinema — for its emphasis on student-created content, project-based learning, teamwork and assessment.

Why machinima?

Although most young people create and watch machinima because it’s fun, it’s more than just entertainment. Educators and students are using this new medium in a variety of innovative ways to express ideas from literary works, music, art and performance. You can also use it to demonstrate content knowledge, document in-world activities or achievements, or examine research. For example, students are using Minecraft to re-create scenes from the American Revolution, reproduce an 18th century Russian peasant village and explore the architecture of Frank Lloyd Wright.

As with any project-based learning, machinima creation requires students to work as a team, negotiate, communicate effectively, manage time and resources, and adhere to set parameters while being flexible and taking initiative. They can use the medium to express their understanding of mathematical, historical, cultural or scientific concepts. Rather than having them take a test that assesses declarative or procedural knowledge, creating machinima allows them to be independent, self-directed learners who express their creativity while showing what they know.

The machinima products students create are also learning artifacts that demonstrate more than just content knowledge. The creation process is just as important as, if not more important than, the final product, because it addresses Common Core, state standards and the ISTE Standards for Students.

Machinima ensures that students use all the language arts, including reading, writing, speaking, listening, and the related subskills of sequencing, vocabulary, text complexity, idea development, research and creative expression. History and literature are common subjects for machinima productions, but you can use the medium to explore any content area.

How to create machinima

When you think about it, games and virtual worlds provide some of the best backgrounds for video — especially when you don’t have a Hollywood budget. They are ready-made 3D worlds that are usually free or relatively low cost and not limited by the constraints of the real world.  The players in the game are the actors, and the action is always on.

In a machinima production, the game is the set and the game characters, or avatars, are the actors. The plot unfolds in the game. Students record their own voiceovers for audio, which they can capture as they play or dub in afterwards. 

The technical aspects of machinima creation provide a focus on camerawork, editing, and special and audio effects. The process can be as easy or as complicated as students want to make it, ranging it very simple real-time capture and production to advanced recording and editing with a script and multiple audio tracks, live acting, set design and musical production. Similarly, the equipment requirements can be as simple as a small laptop and some free online programs, or you can invest in microphones, large screens, external hard drives for storage and sound editing software. Because the quality of the capture and the rendering time will vary based on the software and power of the computer used, you may want to consider investing in better equipment as your students get more proficient.

For beginners, however, it makes sense to start small and build up. Here are some steps to get you and your students started in the machinima-making process:

1. Set up the student groups.

Machinima that’s created in games and virtual worlds like Minecraft, World of Warcraft or Second Life require the director and the actors to operate the game user interface and navigate the 3D environment with some facility. But chances are, many of your students are already familiar with one or more of these virtual worlds, and the rest of your class will surely enjoy learning.
Split your students into groups and them divvy up the tasks. Some common roles include:

Players. These are the students who play the game and operate the characters. Let the in-class experts strut their stuff, at least at first, while the less experienced kids take on other equally important tasks.

Writers. These students co-write the script and collaborate with the directors to complete the storyboard.

Directors. These team members are responsible for designing a storyboard that maps out the action, key shots and areas within the game when the recording will happen.

Voice actors. These students voice the characters and/or serve as narrators.

Cinematographers. These team members operate the screen-capture software, decide on zoom levels and start/end the recording session.

Editors. These students operate the editing software to splice together the final machinima.

One way to begin the collaboration is to give the groups 10-15 minutes to just watch the gameplay. While they are watching, they should be thinking about what they want to record and why. Once the viewing time is up, each group should spend 5-10 minutes brainstorming to decide on their purpose, the aspects of the game they want to record and/or the story they want to tell.

Keep in mind that machinima usually falls into one of three categories: storytelling, tutorials on how to play a certain aspect of the game and exploring a virtual environment. For educational purposes, storytelling and exploring work well. 

2. Capture the video.

Once you’ve got your team set up and the game or virtual environment running, the next thing you need to create machinima is screen-capture software. Download some inexpensive or free software, such as Camtasia, FRAPS or SnapzProX

Typically the screen-capture software will open with a default to record the full screen. However, students can adjust the size of the recording area by clicking on one of the borders and dragging to the desired size. Next, they can just click the record button to begin. The software will let the user know how to stop the recording — usually with either a stop button or by pressing a specified key on the keyboard. Some software includes a pause button, which is very useful if students want to jump to different areas of the game without having to record the character moving to that location.

Most screen-capture software will also capture audio if you don’t have a microphone. If you do have a microphone, you will need separate audio-capture software, which will likely come with the equipment.
Once the recording stops, the computer will enter a rendering period where while it processes and generates a video file. The student will be able to direct where to save the file on the computer.

3. Edit the footage.

Next, students will need to edit the raw footage using video editing software. They can use Camtasia to do this as well or other free/affordable programs, such as iMovie, Windows Moviemaker or Celtx. If your students are developing more advanced editing skills and you’ve got the budget, higher-end programs like Adobe Premier and FinalCut Pro have more features and are more user friendly.

Search the software website and YouTube for tutorials that cover the basics and advanced use of your chosen editing software. However, the most effective method would be to have the student experiment and explore the software.

Here is a common editing process for machinima:

  • Make a copy of the original screen capture before beginning the editing process and only edit copies of the original footage. That way, if there is a mistake, students can simply exit the program and start over. If they are good at saving their changes along the way, they can minimize the amount of rework they need to do. Name the original screen capture and then designate versions in the names of the copy files. For instance, if the original was called “machinima,” the copy could be named “machinima_v1.” As the students make edits, they can save the edited content as machinima_v2, machinima_v3, etc.
  • Use the software to begin making your edits. Open the editing software and open the relevant version of the machinima. Common edit processes are trimming unwanted pieces of the recording, splicing two or more video captures together to make one video, removing undesired audio from the video, adding audio such as music and voice-over, inserting scene transitions, inserting images, and creating slides for titles, narrative and video credits.
  • Save your edits. The editing software will save the file as an editor specific file format. This format will only work for the editor software. When mistakes happen, students will either need to use the undo button or close and start over from the last saved version if there is no undo button.
  • Produce the video. During this step, the editing software format is converted into a video format that can be uploaded to YouTube or other video hosting sites. The most common video format is .mp4, but be sure to review the file formats supported by the video hosting service to make sure it’s compatible.

4. Add audio and other media.

You can find many premade, Creative Commons licensed music and audio tracks on the internet at sites like Jamendo, Freesound and Soundcloud. NASA even has a site on Soundcloud with shareable sounds of launches, missions and the solar system.

This part of the process provides an opportunity to discuss digital rights and ethical use. Students can research what attribution is required and include it in the credits of their video.

Students can also record their own audio using free audio editor, such as Audacity or GarageBand. Some video editing software may also have this ability under a voice narrative or narration menu.

Once they get some practice under their belts, students can begin mixing their media, combining in-game machinima with real-life video and mashing together video from several games to add interest to the story. They can also experiment with ways to create different moods using location — choosing a dark, gloomy or foggy location, for example — adding music, altering the volume of character’s voices and modifying the pace of speech.

5. Learn more.

Ready to go to the next level? Follow these links to find even more resources:

And of course, if you want to know more about machinima, the best source may be the young experts in your class. Go ahead and ask that fifth grader to show you their favorite video, and they may end up showing you one they made themselves.

Want to get more expert advice from your peers? Join one of the more than 20 ISTE Professional Learning Networks for access to year-round professional learning and collaboration, free for ISTE members.

Tanya Martin is a former primary school teacher, English as a second language and bilingual teacher, computer science teacher, teacher of gifted and talented students. She currently works as a professional developer for a large urban district. As the PD chair for the ISTE Games and Simulation Network, she coordinates the annual EduMachinima Fest.

Kae Novak is an instructional designer and student success coordinator for online learning at Front Range Community College in Colorado. She chairs the ISTE Games and Simulations Network. She was chosen as the 2014 Edovator of the Year in the Readers’ Choice Awards by the Virtual Education Journal, and she has co-authored chapters on game-based learning as well as student engagement in immersive environments and pervasive games.