Toggle open
Homepage
Learning Library Blog Engage elementary students with stop animation!
Expand breadcrumbs

Engage elementary students with stop animation!

By Stephanie Hatten
August 15, 2014
Img id 128 Version Id Vb YA Hj P30t SLHI88 J8 L Jo WJ Uos3 Oh K Ds

We hear a lot about student engagement these days. Research has shown that it gets kids involved, helps them learn and remember, and keeps them focused. But creating an educational experience that truly engages all students is not easy to achieve, especially in an age when the classroom must compete with thousands of sources of entertainment and information.

And yet, I think I may have discovered the secret — or at least one of them — for capturing the imagination, investment and memory of students of all ages: stop animation.

How do I know they're engaged? They keep telling me.

In the grocery store one day, a child made a point to stop me and say, " "I remember when you came to my school and taught us about the states of matter." "

At the hair dresser, another child called out, " "Remember two years ago when we made stop animation movies about fact families? That was my favorite day at school." " One of my former students even reminded me of a life-cycle stop animation lesson I had taught him 10 years earlier. That kind of reaction speaks for itself.

As an elementary technology instructional specialist, I have been incorporating student-created stop animation projects in elementary school classrooms for more than a decade, in all subjects and grade levels. Without fail, kids love the process and the opportunity to express their creativity. And because they are so engaged, they seem to learn and remember the content they incorporate into their stop animation projects without even trying.

What to use it for

Stop animation is ideal for helping students learn about concepts that involve processes and progressions — anything that benefits from including an element of movement to explain how it works.

Why not just shoot a video? If you've ever watched a stop animation, you might think that it takes a lot of time to build a video-like sequence using only still photos. However, the medium is surprisingly easy to master and allows young students flexibility and creativity that would be much more difficult to achieve in video. For example, they can draw illustrations or use toys, Legos, manipulatives or household objects, such as cotton balls, to represent abstract concepts, like molecules or equations, that would be difficult to depict in a regular video.

Stop animation is also remarkably versatile. You can use it for just about every subject. Here are a few ideas to spark your imagination:

Science. Countless students have learned about the process of erosion by looking at a static picture in a book, with arrows to represent movement. But if the students can use stop animation to illustrate science vocabulary words, such as erosion and deposition, these abstract concepts start to have more meaning for them. Other science processes I have taught with stop animation include life cycles, food webs, the process of collecting energy, moon phases, fossilization, planet rotations, and recessive and dominant gene inheritance.

Math. Concepts that involve progression, such as place value and fractions, lend themselves well to stop animation. Students can also use math manipulatives to demonstrate how they solved a word problem. In primary math, students can use stop animation to demonstrate processes such as counting, patterns, addition, subtraction and fact families.

Language arts. In the primary grades, students are asked to practice spelling by sorting objects by the letters they start with. Have them use stop animation to show this sorting. They can also use magnetic letters to show how to create new words. Or they can show letter combinations that result in specific sounds or rhymes, Sesame Street style. Older students can create stop animation book reports or re-enactments of their favorite stories from literature.

Social studies. Have them use dolls, toys, Legos or clay sculptures to re-enact events from a historical figure's life, such as the travels of Lewis and Clark. Stop animation also works well to depict timelines.

How to do it

Stop animation is not as difficult or time consuming as it might seem. The technology tools have changed over the years, and my use of many programs and devices has given me a wealth of experience with the features of various apps and web 2.0 tools that can help with this task. And I have found that, with a little practice, kids of any age can knock out quality projects within a single class period. In fact, check out this video that a ninth grade student created in one hour to introduce elementary school children to the stop animation process.

Here are some basic steps for using stop animation to help students learn and express their learning about any subject, with tips for making the process as painless as possible:

  1. Choose a stop animation program.
    My favorite tool for teaching with stop animation is the Lego Movie Maker app, as it's simple to use. You may be tempted to buy a program with every feature under the sun in an attempt to get your money's worth, but keep in mind that as the number of options increases, so does the level of complexity and the time needed for students to get comfortable with the program. Since classroom time is always limited, learning how to use the program ends up becoming the focus of instruction instead of the content. If you don't have iOS devices for your students, any slide show or movie editing program that allows you to alter the timing of the slides will work.

  2. Learn how to use the program.
    If you don't have a movie editing expert on your staff for a one-on-one training, just watch one of the many free tutorials, like this one that shows how to use Windows Movie Maker, on the internet. For elementary students, I recommend setting the timing of the slides to around .35. Try creating a few sample movies of your own, both for practice and to build a library of samples the kids can use for inspiration — which brings us to Step 3:

  3. Have your students watch sample stop animations.
    Show them your masterpieces and/or look for age-appropriate videos on the internet. The topics of the films don't really matter, as the point of this step is for students to see how movement works in a stop animation before they start planning. Without this understanding, they are likely to present a completed project with four pictures that show stages instead of movement.

  4. Give the students guidelines.
    Don't go overboard on these, as students should get a chance to exercise their creativity and make decisions. But you will probably want to give them a time limit for their videos and approve their topics. For younger kids, you may want to give them something specific to address, such as a list of three vocabulary words to cover.

  5. Work in groups.
    Collaboration is key, in school and in life. Kids need to figure out how to contribute their individual talents to a team now, as they'll be asked to do it in their future careers. Stop animation requires various skills and proclivities, from creativity and artistic talent to organizational skills and project management. Working in teams lets each of them practice working with others — and meet the ISTE Standard for Students addressing communication and collaboration — while getting the chance to shine in their own right.

  6. Select or create the materials.
    My mantra is to keep it simple. You want the kids to be focusing on the content, not a complicated process. I usually have students create a stop animation to start with that shows basic movement, such as the difference of molecule movement in solids, liquids and gasses. Be creative but simple with the materials as well. I make a point to call it stop animation, because when I used to say clay animation, I saw teachers tense up as they thought of the mess. Students do not have to spend hours creating materials, and messes are not necessary. Have them use classroom manipulatives to start with. In the solid/liquid/gas example, we used cotton balls.

  7. Mount the camera.
    You can use a standalone digital camera, a tablet or a phone for this project. Document cameras with camera features also work great. You don't need video capabilities, as you will be taking still photos and using the program to stitch them together. The most important thing to accomplish is keeping the camera still, and all you need to for that is a tripod, or even just a stack of books to mount it on.

  8. Do a run-through.
    You can have the students create storyboards for their projects, but these add an extra step and take time. Instead, consider asking them to just act out all of the movements with their materials before they start shooting. Keep reinforcing that smaller movements are better.

  9. Publish!
    Students love to show off their work, so make sure they get the chance to do so. The beauty of digital video is that it's easy to put on YouTube (you can make it private or unlisted), your school learning management system, or your class website or blog. When they know their work will be seen by an authentic audience — whether that's their classmates, parents at an open house or the internet at large — they are even more motivated to do their best work. If each team has covered a different part of a topic — such as different cellular processes, for example — you can package them together in a database, wiki or webpage that the whole class can refer back to when reviewing for the unit test.

  10. Repeat.
    When students get the chance to do several projects on different topics, they'll not only practice and improve their stop animation skills, they will also start to feel more confident taking risks, which allows them to stretch their creative muscles. Try using stop animation in your classroom once a month for different content areas. The quality of these projects will improve over the course of the year, and it will take less class time to explain the assignment and master the technology skills.

Although most of my experience with stop animation has been in the elementary school setting, I have seen high school students create movies about molecules, DNA strands and other scientific processes. I have also taught stop animation after school, before school and at summer camp. And every time, I have found this project-based learning to be so motivating for students that they always want to create more, and so memorable that they master the content effortlessly. Most important, it helps them make the crucial transition from consumers of media created by others to producers of content they can share and be proud of.

Stephanie Hinshaw Hatten is the district technology instructional specialist for Galena Park Independent School District in Houston, Texas. She holds a doctorate in educational leadership with a specialization in curriculum and instruction as well as a master's in instructional technology. She has been in public education for 18 years, and she believes in authentic, project-based learning and differentiated staff development based on instructional coaching models.

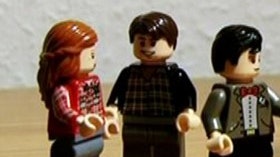
Image: The Tardis materializing (cropped) by Spielbrick Films. Found on flickrcc.net.